
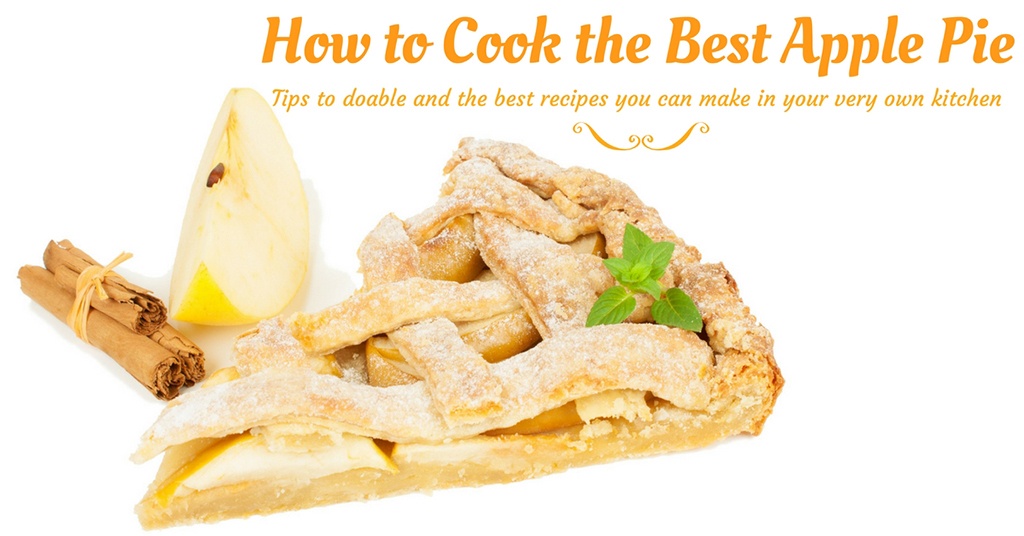
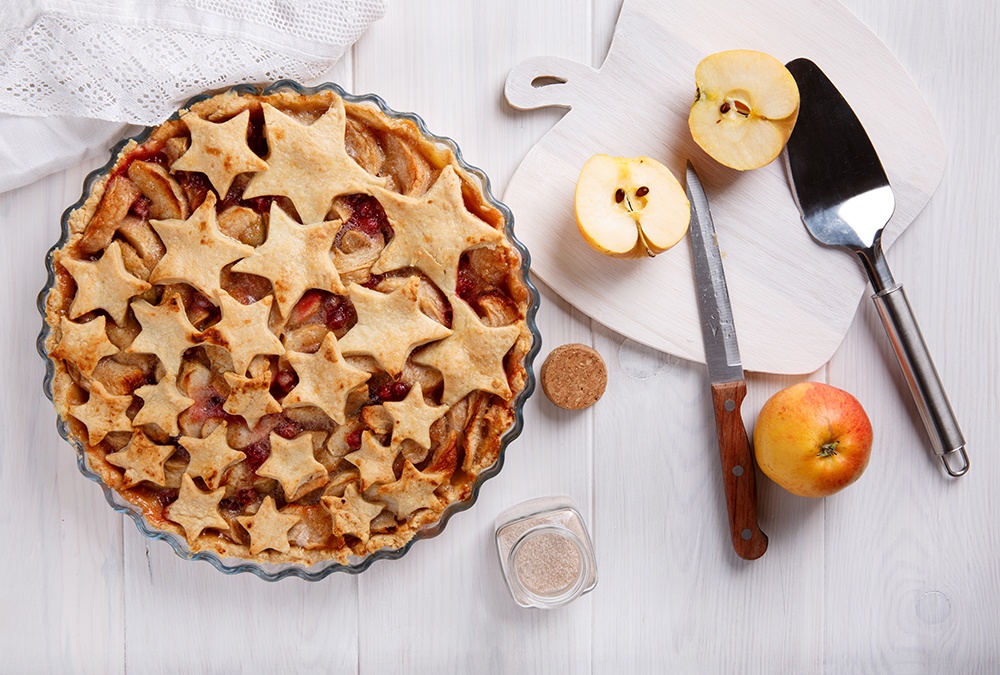
Baking the best and perfect apple pie can be a bit tricky especially when you don’t know the right ingredients, equipment and the right methods in baking. Fret not, here; you will be provided with tons of information – from effective tips to doable advice as well as the best recipes you can make in your very own kitchen!
More...
Overview of Apple Pie
Apple pie is one of the most favorite dessert and side dish that gained popularity not just in Europe and America, but also to all places in the globe. Below is the overview of apple pie and little things you should know about it.
What is Apple Pie?
Apple pie is a kind of a fruit pie that uses apples as its filling. It is often served with topped ice cream, whipped cream, or alongside with cheddar cheese.
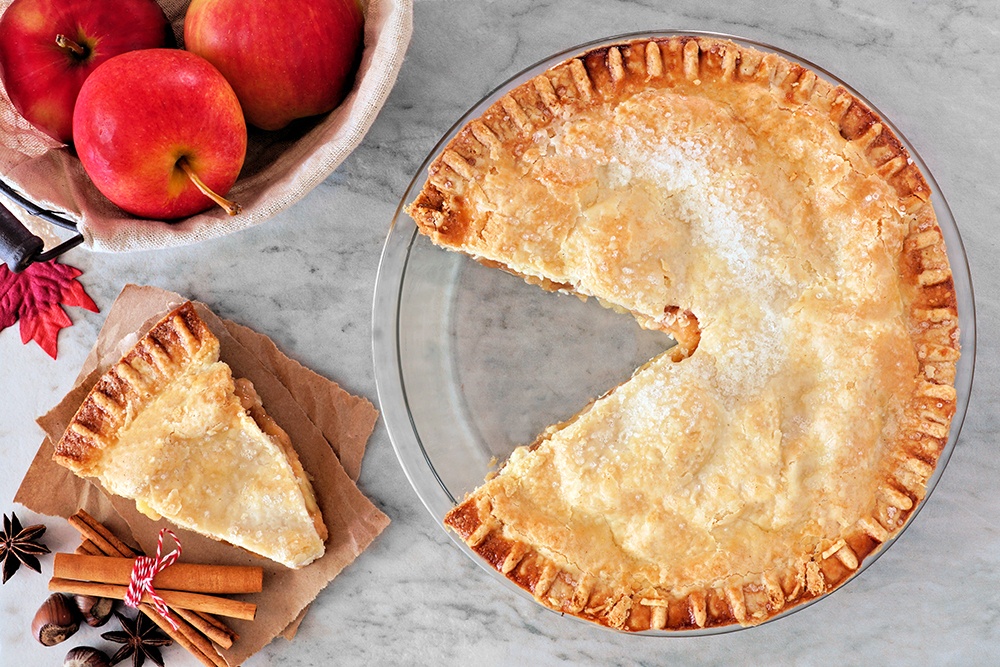
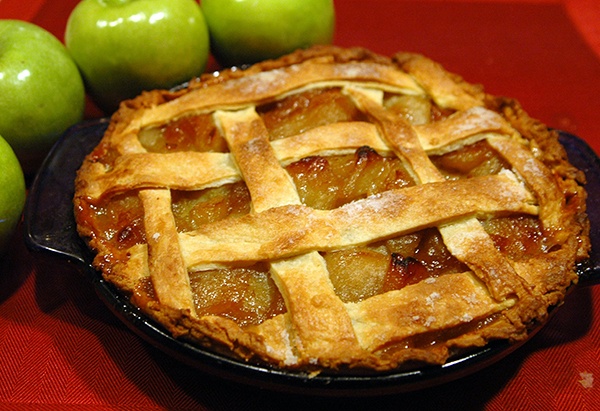
Unlike most of the baked goods, pies are often double-crusted, top and bottom, where the top is sometimes a pastry lattice woven of crosswise strips or a simple circle crust. Some other kinds of apple pie include open-face Tarte Tatin and deep-dish apple pie that has an only top crust.
It uses different kinds of apples which include Northern Spy, Bramley, Granny Smith, Empire, McIntosh, etc. (For more apple types, read 12 Great Apples for Baking) Some bakers, especially home bakers, use canned or reconstituted fruits for the filling.
Types of Apple Pie
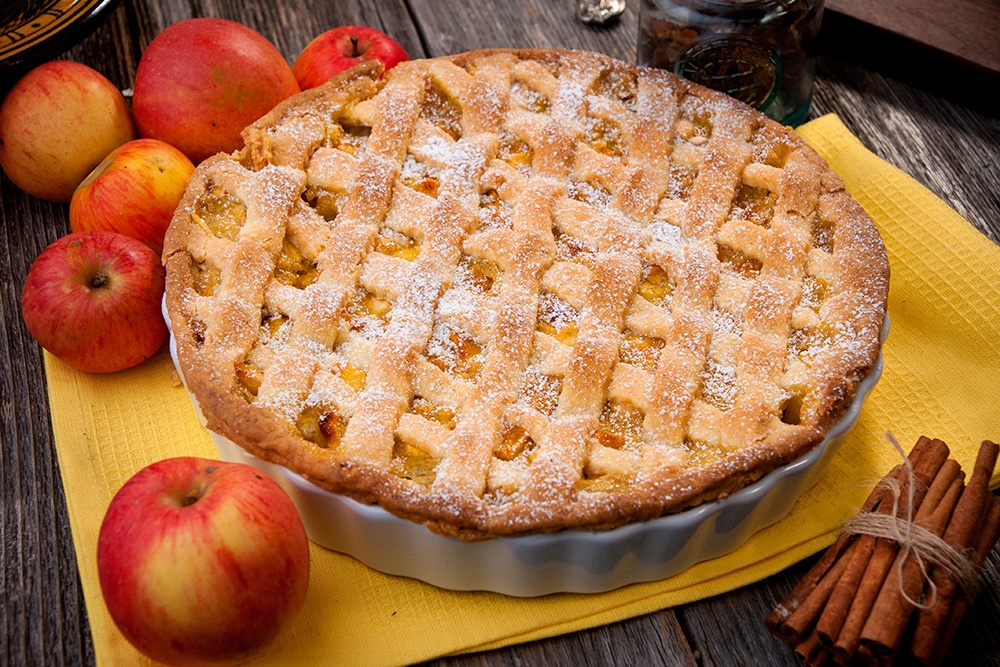
Apple pies can vary in many different ways. For instance, you can have it in French, Swedish or English style. Below is the list of amazing variations of homemade apple pie.
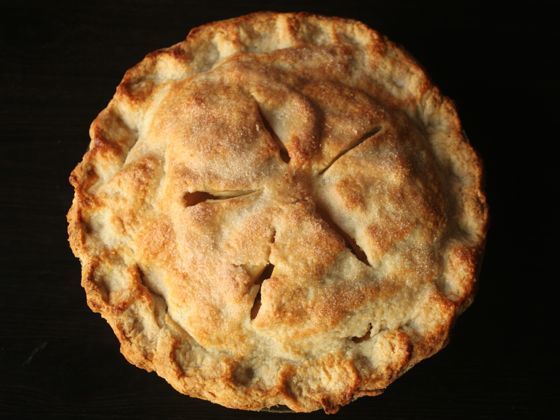
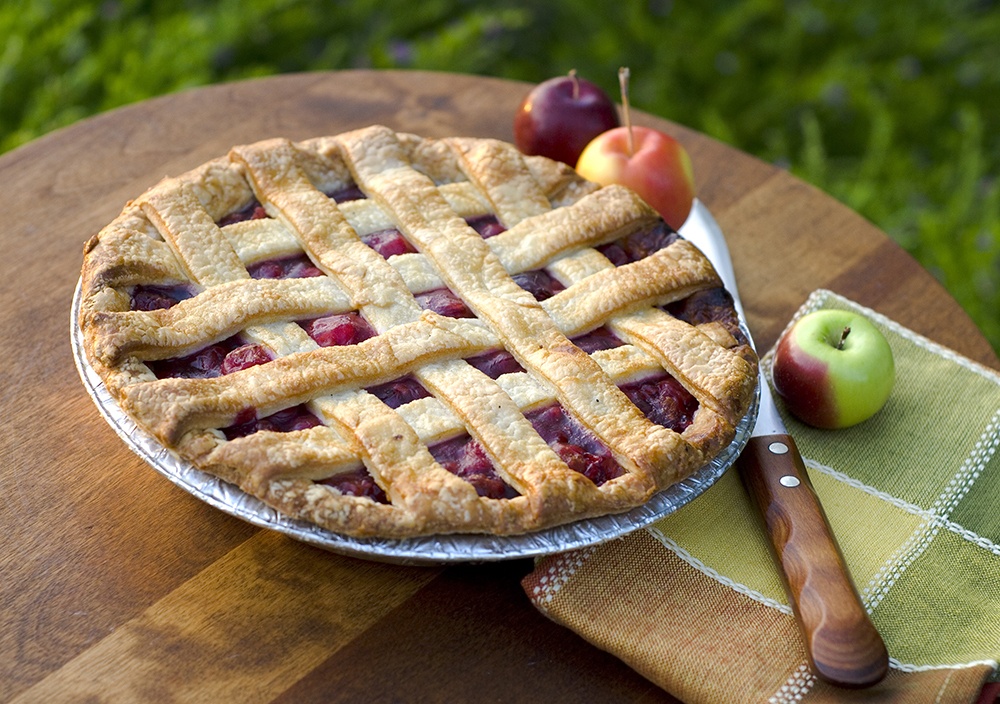
Double-Crust Apple Pie
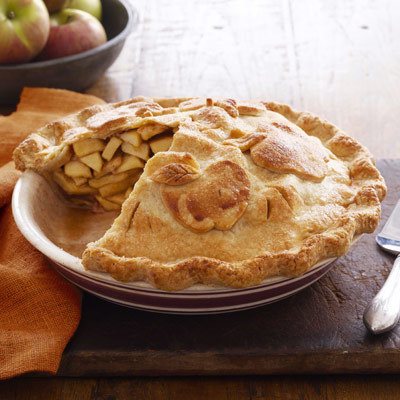
Double-Crust Apple Pie Via goodhousekeeping
The most common and most baked type of apple pie across the world.

Mini Apple Berry Crumble Pie
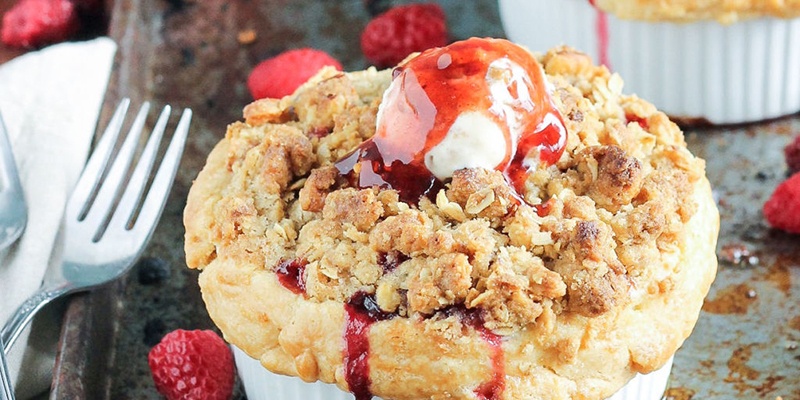
Mini Apple Berry Crumble Pies Via delish
A combination of berry and apple crumbles in mini pies
Crustless Apple Pie
Crustless Apple Pies Via delish
This variation uses no dough and therefore produces no crust. It is all made with the apple fillings and topped with any toppings you like (perfect for ice cream and cream toppings)
Apple Cranberry Pie
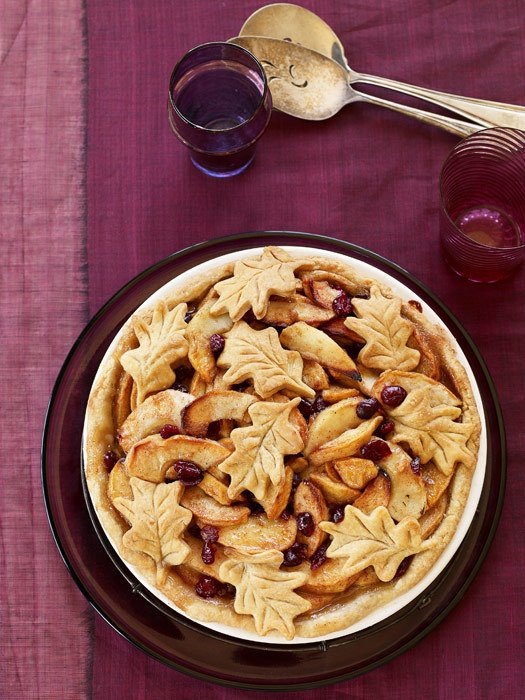
Fall Apple Cranberry Pie Via redbookmag
You can also combine your apple pie a tart twist of cranberries for a more fruity experience of eating pies.
Apple Pie Undone
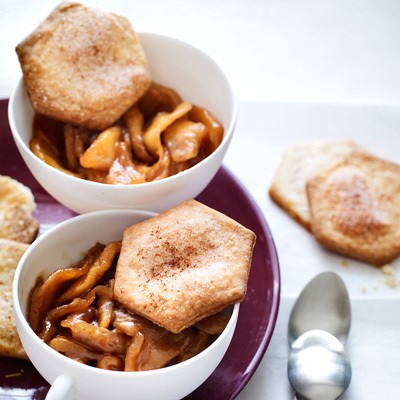
Apple Pie Undone Via delish
This type is elementary to make than the typical apple pies you bake in the house. Still, you have the crust and the fillings ---separately.
Apple Cider Cream Pie
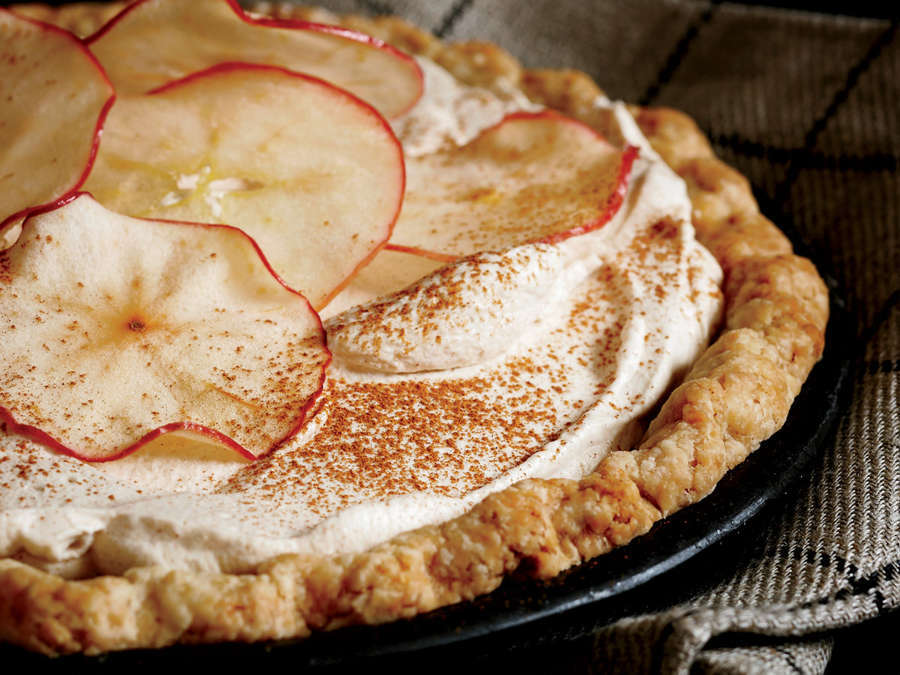
Apple Cider Cream Pie Via foodandwine
This is one way to enjoy your apple cider and cream!
McDonald’s Apple Pie
McDonald's Apple Pie Via delish
Yes, you can copy your favorite McDonald’s style apple pie
What does Apple Pie taste like?
Of course, your apple pie should taste like --- how your apples taste like. However, because it is baked and mixed with other types of ingredients, taste can vary and is different from your “fresh” apple fruit. Apple pies can be sweet and salty because of the dough.
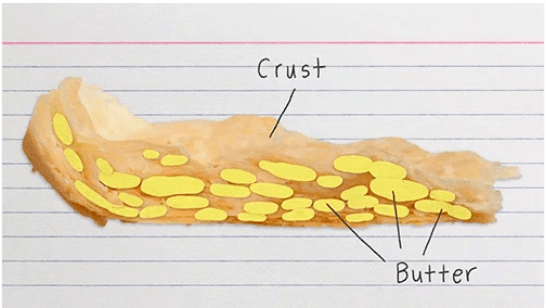
When baked, the dough turns into crispy, flaky crust that has a moist and soft inner parts. It can also be cheesy and buttery especially some bakers like to brush the top with some eggs or butter/cheese.
Interesting Facts on Apple Pie
- It is loaded with a lot of nutrients, vitamins, and minerals. It also has many health benefits compared to other desserts.
- It is known to be invented in England and has been their food over 600 years ago.
- The preparation of the crust can be very complicated
- Other fruits like blackberries, strawberries, apricot, and others are also used as fillings.
- McDonald added apple pie to the menu as a dessert in the year 1960s.
- Because sugar was too expensive, early English apple pie was made with figs.
- Grabby Smith apples were among the best apple to use for baking apple pie.
20 Facts About Apple Pie Via factslegend
For more interesting facts, read Facts Legend’s 20 Facts on Apple Pie
Unique Ways to Enjoy Your Apple Pies
Apple Pie Monkey Bread by Kimber at Pinning Mama
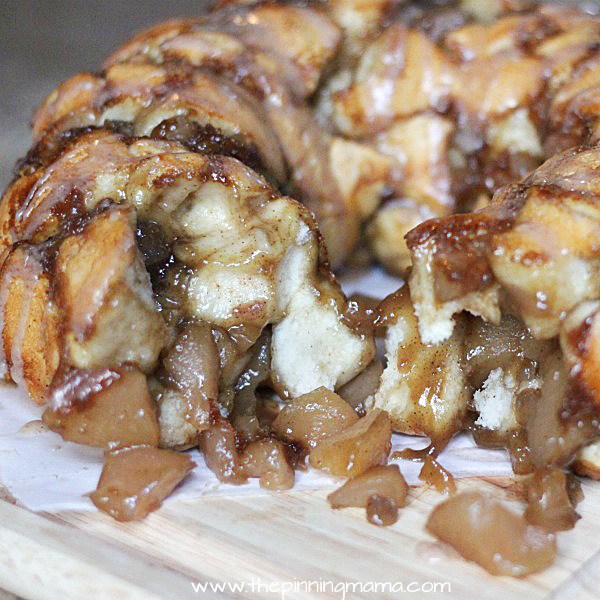
APPLE PIE MONKEY BREAD Via thepinningmama
Salted Caramel Apple Hand Pies by Kelly Senyei at Just a Taste
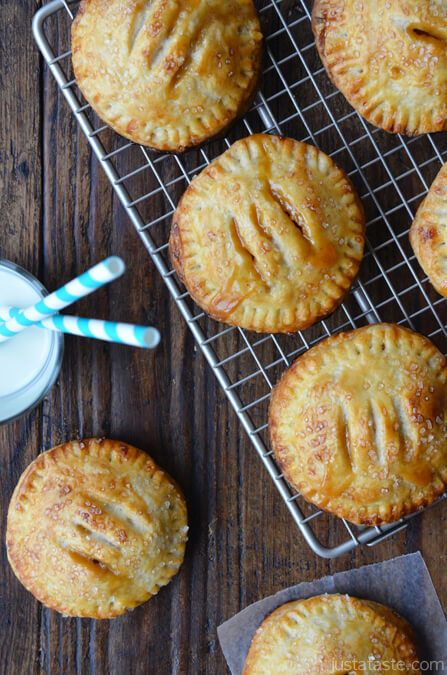
Salted Caramel Apple Hand Pies Via justataste
Sweet Apple Crostata by Harry and David

SWEET APPLE CROSTATA Via blog.harryanddavid
Apple Crisp Cookie Cups by Olivia at Live For Cakes
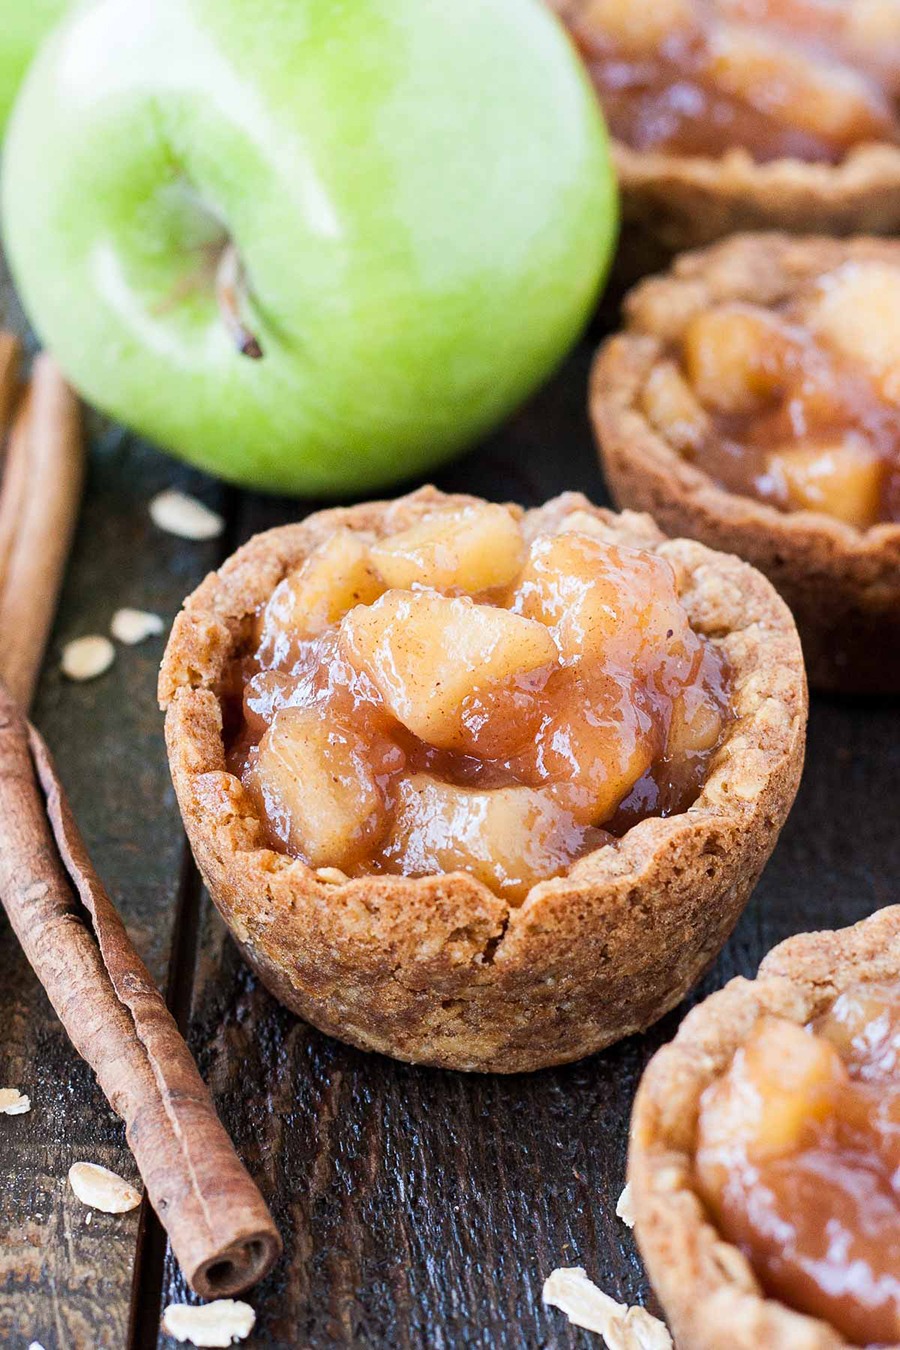
APPLE CRISP COOKIE CUPS Via livforcake
No Bake Snickers Caramel Apple Pie at Daily Leisure

Snickers Caramel Apple Pie Via pinterest
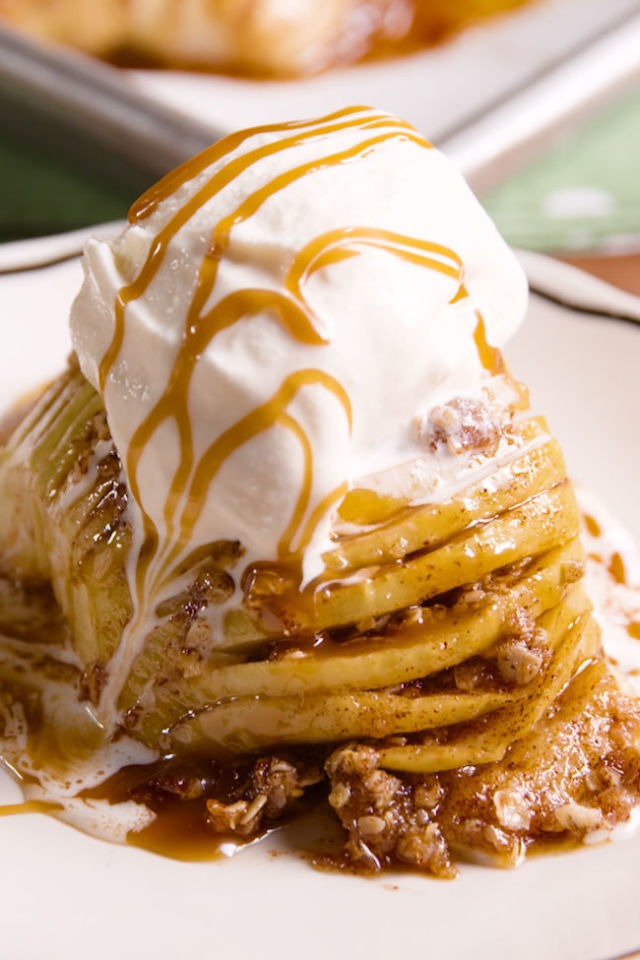
Salted Caramel Pecan Apple Slab by Felesha at Say Grace Blog
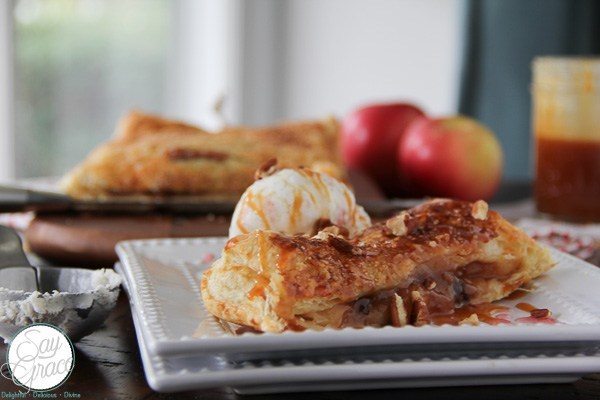
SALTED CARAMEL-PECAN APPLE SLAB Via saygraceblog
Complete Guide to Cook Apple Pie
Here is one fact you should know --- baking a perfect crust can be a bit difficult. It needs a perfect measure of ingredients and a correct baking time. This is why, here, we provide you a very comprehensive step-by-step procedure on how to cook your apple pie properly, with a lot of tips and tricks you can apply in your cooking method.
Ingredients that You Need
Pie Crust
2 2/3 Cups of Flour
1 cup of cold butter
One tablespoon of sugar
½ teaspoon of idolized salt
Seven tablespoons of ice-cold water (you can add apple cider and vodka)
Secret Ingredients
Fillings
8 cups of cooking apples
1-tablespoon cornstarch
1-tablespoon cinnamon
2-tablespoon butter/margarine
¼ teaspoon salt
¼ teaspoon ground nutmeg
Sugars
Extra Ingredient for top crust
Crumb Toppings (optional)
The Complete Guide To Making Apple Pie At Home Via firstwefeast
Vary the crust-on-crust approach by topping your apples with crumble. You will need only one pie crust for your bottom. Here, we will make Cara Eisenpress’ Crumb Topping. You just need the following:
1 cup oats
¼ cup flour
½ cup of brown sugar
¼ chopped nuts
¼ teaspoon of cinnamon
One pinch of salt
½ cup of chilled unsalted butter
Tools and Kitchen Equipment You Need
2 Medium-sized mixing bowls (preferably one heat-resistant bowl and one ordinary mixing bowl)
Food Processor
Wooden Spoons
Pie plates
Wooden or stone pastry board
Rolling pin
Canning Jar
Plastic wrap for covering the apples
Colander for draining apples
For more apple pie equipment, read Pie Chef’s Pie-Making Equipment
How to Make The Crust
How To Make Pie Crust Via countrycleaver
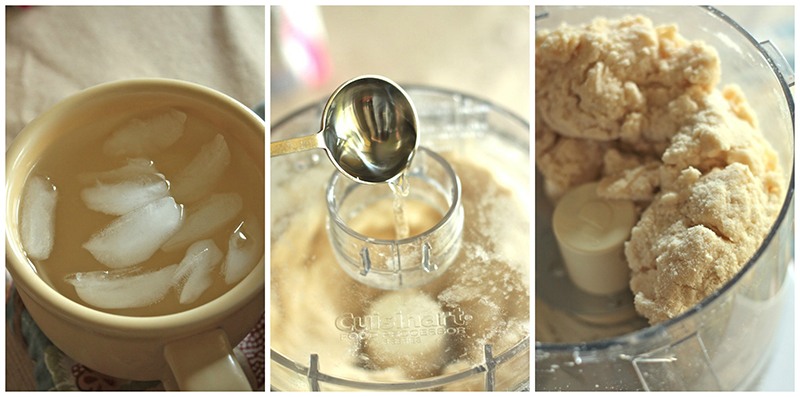
STEP 1 | Sift the flour and salt |
STEP 2 | Mix the flour and salt into the mixing bowl. Mix the two ingredients through stirring Heat-resistant mixing bowl helps you to maintain a cool temperature while making the dough. This helps to prevent the gluten to form. The goal here is to work the butter into the flour without melting it. It is advised to chill your butter while you are working on your dough.
|
STEP 3 | Cut your butter into your flour mixture. Again, before cutting your butter, it is better to keep it in the fridge for up to 30 minutes before cutting it into large chunks.
|
STEP 4 | Pour your cold water into your flour mixture. As you stir the flour very gently while consistently adding a small amount of cold water, use a wooden spoon. Pour up to two tablespoons of ice water at a time, while integrating slowly by agitating the flour. Make sure it is not wet or damp.
|
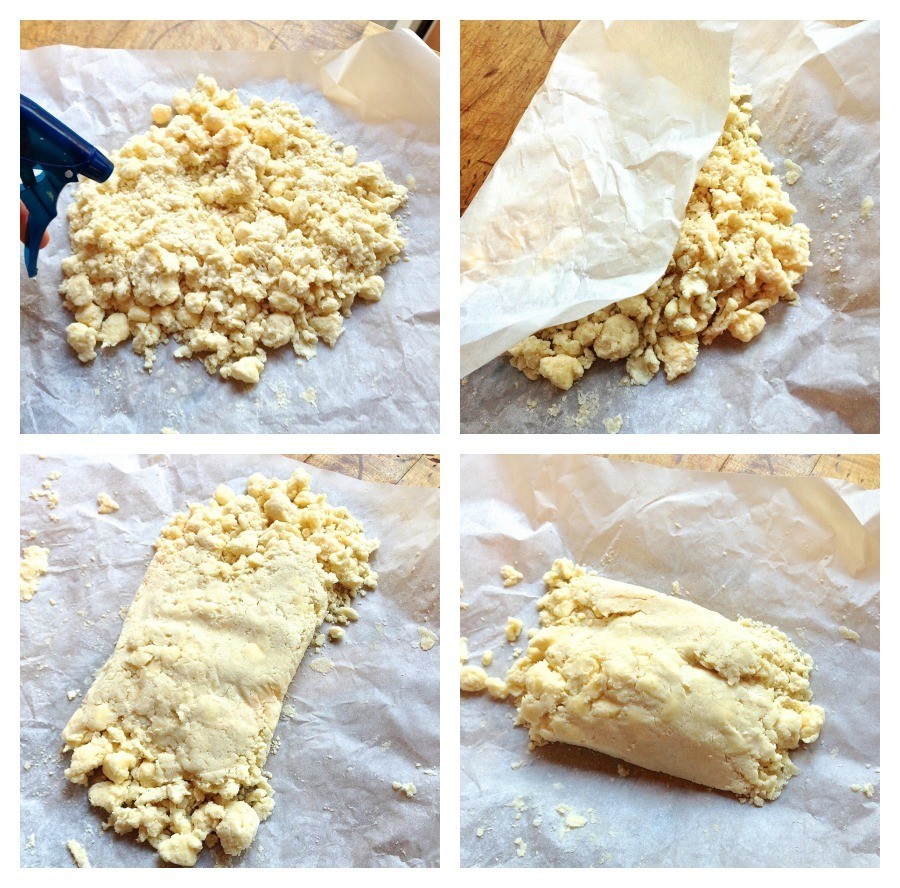
STEP 5 | Every time you overwork, put the flour mixture in the fridge and chill it until it is to a workable temperature again. Form the dough through your hands |
STEP 6 | Make a ball shape and pull the flour very gently, while avoiding to overwork it with hands. |
STEP 7 | Split the ball into equal portions. This will be your lower and upper crusts. Split the ball through cutting it with a good-sized kitchen knife.
|
How to Make A Pie Crust Via Allrecipes
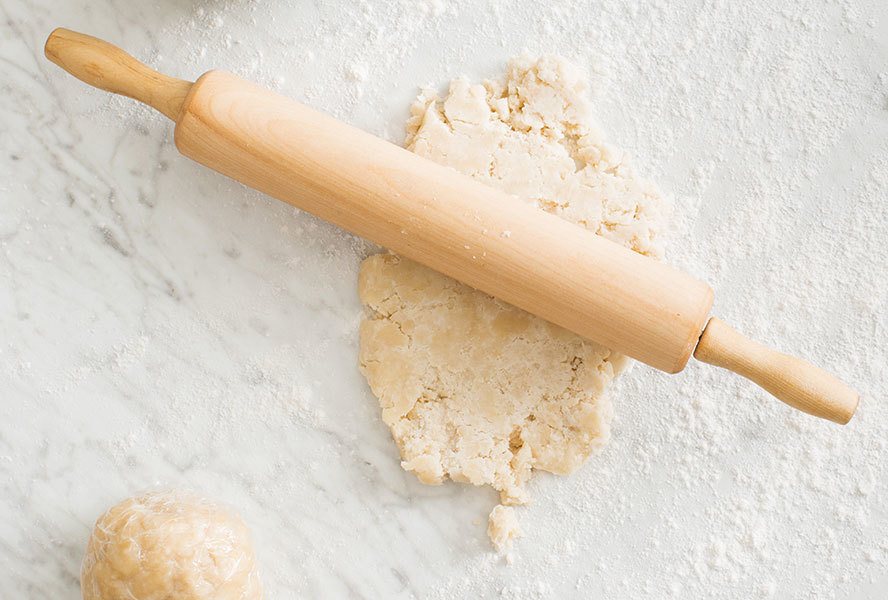
How to Roll Out The Crust
Rolling out your crust is all about having a nice and flat surface. Before working with it, it is nice when you have frozen it 30 minutes before preparing it for rolling.
Rolling An Even and Round Pie Crust Via PastryAide
STEP 1 | While waiting for 30 minutes for your dough to chill, prepare your rolling surface. You can use a clean and soft surface while others use plastic bags or wax paper.
|
STEP 2 | Let your dough rest for up to 15 minutes after getting it from the fridge and before rolling it out. This will make your dough warm enough not to crack when you roll it. |
STEP 3 | While waiting for your dough to warm, clean your rolling surface. Wash and scrape your pastry board or any surface you wish to use. If you washed it, dry before using.
Whether you are using your kitchen counter or any pastry board, sprinkle some flour onto the surface evenly before placing the dough. Sprinkle another layer on top of the dough.
|
STEP 4 | Rolling out the ball of dough. To make sure that the dough will not stick on the rolling pin, sprinkle an amount of flour on the rolling pin. Start rolling from the center, while rotating it around to smooth the dough evenly. Roll it in different directions.
|
STEP 5 | With care, transfer the crust to the pie plate. You can use a wax paper or your rolling pin. Handle it carefully as it might tear the crust.
|
STEP 6 | Unroll your dough and press it into the plate very gently. To press the dough, use your finger. Trim the edges with a sharp knife, and use the strips to patch any tear and rips on the crust. You can skip greasing your pan. Your crust should be easily removed from the pan once it is cooked |
STEP 7 | Fill your crust with your fillings |
How To Prepare Apple Filling
A. Choosing Apples
Here, you need about 8 cups of sliced apples. You can also use six medium-sized apples, or eight small apples, or four to five large apples. Choose at least two different apples.
Firm apples are great for the pie (apples that are crunchy when you bite it) while soft apples like Macintosh, are food for the sauce. If you are not choosy, you can pick any good apples in the grocery. However, if you are, you can follow this tip from Baked Greens:

Baked Greens Via bakedgreens
- For a sweeter filling, use three pieces of Fuji and three pieces of Braeburn apples.
- For a tartar filling, use four pieces of Granny Smith and two pieces of Honeycrisp apples
B. Prepping Apples
STEP 1 | Preheat the oven up to 425 degrees Fahrenheit |
STEP 2 | Peel, core, and slice your apples into pieces about ¼ inch thick |
STEP 3 | Heat the apples. Place them in a bowl and pour about three quarts of boiling water or cider over them
|
STEP 4 | Cover the bowl with a plastic wrap. Set aside for 10 minutes to activate the enzymes. |
STEP 5 | Dry apples by transferring them to a colander. Drain them by tossing occasionally for about 10 minutes. |
C. Adding Sugar & Spices
STEP 1 | In a small bowl (you can use a cup), mix the sugars, cornstarch, cinnamon, nutmeg, and salt. You can use an ordinary spoon. |
STEP 2 | Sprinkle the sugar and cinnamon mixture into the bowl where your apples are placed. |
STEP 3 | Toss gently and let it stand for ten minutes or until it gives off a little juice. |
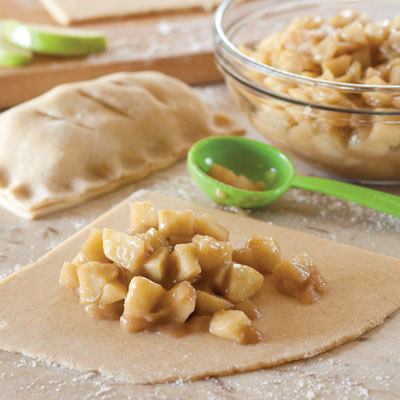
D. Filling Apple Pie
STEP 1 | Prepare crust. Prepare your pie crusts in a nine-inch pie plate. When you are now trimming the edges, make sure to leave ½ inch of dough overhanging. |
STEP 2 | Line and fill the pie plate by mounding up the apples in the center. Discard the excess juices in the bottom of the bowl.
|
Vents & Decorating
STEP 1 | Moisten the overhanging edge of your bottom crust before putting the top crust on it. |
STEP 2 | Trim the overhang (one-inch size). Press the edges to seal the bottom and top pastries together around the pie’s edge. |
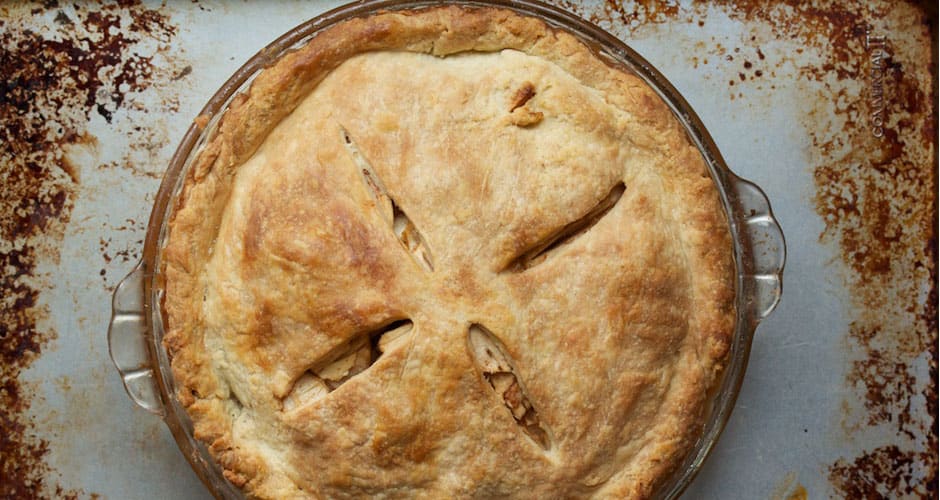
STEP 3 | With a sharp knife, cut decorative slits on the top of the pastry for aesthetics. It also allows the steam from the insides to escape.
|
STEP 4 | Sprinkle some white sugar, or brush your top crust with egg, milk, or butter (Optional) |
How To Make Crumb Topping
Of course, you can always opt to one crust (bottom) apple pie and just make some crumb toppings on the top of the pie. Here is how you would make your classic crumble topping:
The Perfect Crumble Topping Via Kitchen Stories (US)
STEP 1 | In a bowl, mix your oats, flour, sugar, cinnamon, nuts, and salt. Mix by spoon |
STEP 2 | Cut your chilled butter into pieces |
STEP 3 | Work the butter pieces with your hands until large clumps are formed |
You can also make this coconut crumb topping if you like.
How To Bake Apple Pie
STEP 1 | Preheat oven to 425 degrees Fahrenheit |
STEP 2 | Place your pie in the oven and bake for 40 minutes
|
How to Cool and Rest Apple Pie After Baking
Cooling your pie is very easy. After getting it off from the oven, let it rest for 30 minutes before serving, or until it has a room temperature.
Apple Pie Troubleshooting
You might think baking pie is easy, yet end up destroying some parts or the whole thing! Don’t worry; we provide the most common problems you might encounter as well as the possible reasons and effective ways to fix them – all for a perfect cooking experience
The dough is too crumbly
FLAKY, TENDER PIE CRUST: TWO QUICK TIPS Via blog.kingarthurflour
When you roll it, and your dough breaks and crumbles, it means that your dough lacks some moisture and therefore too dry for a perfect dough.
Possible Causes
- You put too much flour
- You put small amount of butter and sugar
- You put small amount of cold water
Fixes
- Put the right amount of flour (as recommended in the recipe)
- Put a right amount of butter
- Sprinkle some cold water over the dough gently
If you are fixing your dough and it gets warm, bring it back to the fridge before working with it again.
The dough cracks when I roll it
How to Make Perfect Butter Tart Pastry Via foodnetwork
When you roll your dough, it immediately cracks, leaving you frustrated. This is probably because your dough is too cold or too dry.
Possible Causes
- You put it in the fridge for so long
- You didn’t sprinkle enough cold water
Fixes
- Allow it to sit for a few minutes on the counter, but don’t let it get too warm
- Sprinkle some cold water until it gets moistened
The dough sticks to the rolling pin and the countertop
When it sticks, it means that it is too moistened that it sticks to the rolling pin or to the surface where you put the dough
Possible reasons
- You didn’t chill the dough before rolling it out
- You didn’t sprinkle some flour on the countertop before putting the dough (or didn’t put wax paper) and on top of the dough
Fixes
- Before rolling your dough, let it chill in the fridge for 30 minutes and allow it to sit for few minutes before rolling
- When using a countertop, sprinkle some flour or use a wax paper between the surface and the dough, as well as on top of the dough before rolling it out
The crust is soggy

The Surprisingly Easy Secret to Perfect—Never Soggy!—Pie Crust Via bonappetit
Soggy Bottom Syndrome is too common among bakers. There is a lot of reasons to this
Possible reasons
- You need to par-bake your crust
- The filling is too liquidy
- Make sure you drain your apple fillings for up to 30 minutes before putting some sugars and spices
Fixes
- Brush the bottom crust with beaten egg or heated jelly before putting off your filling
- Bake the crust partially before adding the filling
- Try putting it in the oven on the bottom closer to the heat source
The crust is too pale

The One Pie-Making Step You Should Never Skip Via bonappetit
When your crust is too pale, it is probably under-baked, or you put some ingredients like lemon and vinegar
Possible causes
- You didn’t bake it at the right temperature
- You didn’t bake it enough in the oven
- You put lemon juice or vinegar. These ingredients inhibit browning
Fixes
- Increase the temperature
- Bake it again for few minutes
- Brush the top crust with beaten egg or milk for a glossy and golden appearance
The crust is too tough and hard
The Food Lab: The Science of Pie Dough Via sweets.seriouseats
When you have already cooked your dough, and you got a very tough crust, you can’t do anything about it except to cook again and try not to make the same mistakes, which can be:
Possible reasons
- You put too much cold water into the dough
- You overworked your dough
Fixes
- Plate up a slice and throw on a scoop of ice cream (just don’t do the same mistakes again next time)
Tips & Tricks
Making Apple Pie without Apples
Yes, you can make an apple pie without some real apples! This is what we call mock-apple pie. Below is a recipe from All Recipes.
Mock Apple Pie Via allrecipes
Ingredients:
- 2 cups water
- 1 cup white sugar
- 1/2 cup packed brown sugar
- 1teaspoon ground cinnamon (divide by two)
- Two teaspoons cream of tartar
- 30 buttery crackers
- 1 cup crushed buttery round crackers
- One recipe pastry for a single crust
- 1/3 cup butter, melted
Procedure:
STEP 1 | Preheat the oven to 425 degrees Fahrenheit |
STEP 2 | Heat the sauce pan on medium heat and mix water, cream of tartar and white sugar. Wait until boil |
STEP 3 | Pour the whole crackers and boil again. Pour the mixture into the pie crust before sprinkling some cinnamon. |
STEP 4 | Mix the brown sugar, another half of cinnamon, butter and crushed crackers and sprinkle them over the filling |
STEP 5 | Bake it for 15 minutes and lower heat into 375 degrees Fahrenheit. At this temperature, bake within 15 and 20 minutes. Enjoy! |
Making Apple Pie Without Oven

How to Make Mini No-Bake Apple Pies Via snapguide
Here, you can bake your apple pie even without an oven and dough! Jessica Ramos at Snap Guide brings this recipe to you. You just need the following ingredients and equipment.
Equipment:
Ingredients:
- One large apple (peeled, cored and cut into chunks)
- Ten slices of bread
- ½ cups powdered sugar
- One teaspoon cinnamon
- Two tablespoon wheat flour
- One teaspoon vanilla extract
- One tablespoon milk
- One egg, beaten
- Water
Procedure:
STEP 1 | Peel the apple(s) and cut into small chunks |
STEP 2 | Put the apples into the pan over medium heat and add ½ cup of water. Let it cook for about 10 minutes or until you see the water is thickening with the Apple's sauce. |
STEP 3 | While waiting for the apple to cook, mix your wheat flour, powdered sugar, and cinnamon in a small bowl, and put the mixture into the pan. |
STEP 4 | Stir, and you let it cook for another minute. You will have a thick consistency |
STEP 5 | Prepare slices of bread by putting them in the microwave for 15 to 20 seconds, to make them firm enough to hold the apple filling. |
STEP 6 | Add a spoonful of filling to one of the two slices of bread, and then cover the bread with the other. Ten slices of bread make five sandwiches. |
STEP 7 | Use a cup (smaller than the size of bread) and press firmly down while rotating to tear the sandwiched bread. You would have small bread capsules. |
STEP 8 | Crack and put the egg into another bowl. Add the milk and vanilla extract. Whisk with a fork |
STEP 9 | Dip the bread into the egg mixture. Do not let them soak too much |
STEP 10 | In another pan, add some butter for oil |
STEP 11 | Add the bread and cooked until they turned brown (both sides). They were already ready to eat, so you don’t need to over cook the bread and their filling. Enjoy! |
Making Apple Pie Moonshine by All Recipes
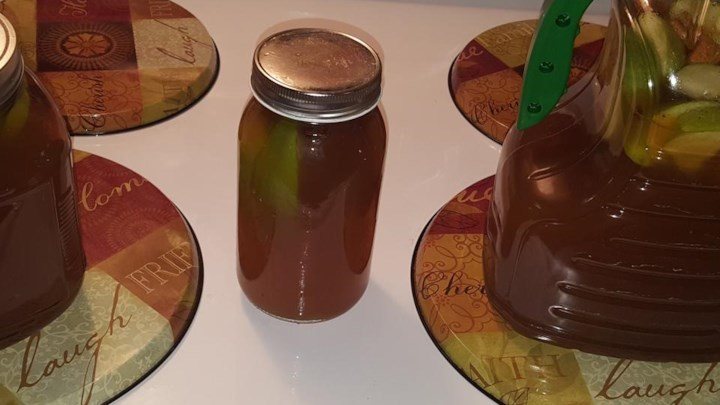
Apple Pie Moonshine Via allrecipes
Ingredients:
- 750 ml bottle 190 proof grain alcohol
- 750 ml bottle vodka
- 1-gallon apple juice
- 1-gallon apple cider
- 2 cups white sugar
- 2 cups brown sugar
- Four cinnamon sticks
- One pinch apple pie spice
Procedure:
STEP 1 | Mix the apple cider, apple juice, cinnamon sticks and the two sugars in a pot, and let it boil. Make sure you cover with lid |
STEP 2 | Reduce the heat and simmer for an hour. Remove the pot and cool |
STEP 3 | Mix vodka and grain alcohol and pour into the mixture. Remove the cinnamon sticks if you want to |
STEP 4 | Pour into the jar and let it cool completely; fridge |
Making Apple Pie Oatmeal
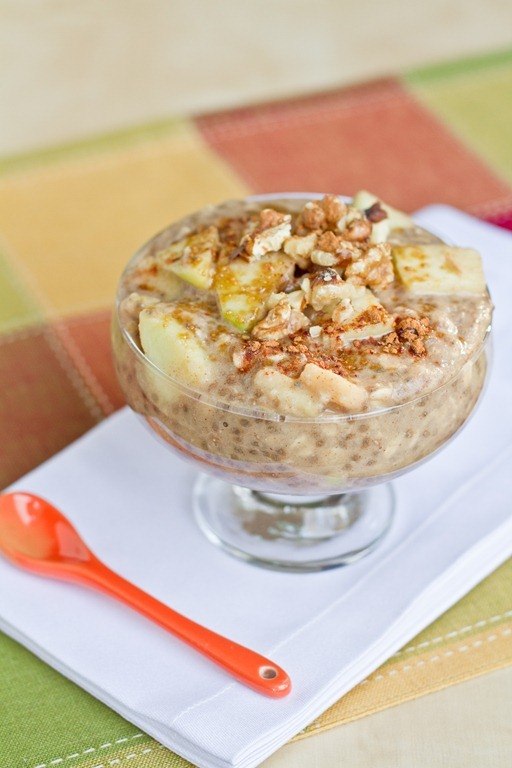
Apple Pie Oatmeal Via ohsheglows
This recipe is from Oh She Glows website. It is entirely vegan, soy-free and oil-free. You just need the following.
Equipment:
Ingredients:
- 1/3 cup rolled oats
- 1 1/3 cups of apple, peeled and chopped into chunks
- 1 1/4 cups unsweetened almond milk
- 1/2 cup unsweetened applesauce
- One teaspoon ground cinnamon
- 1/4 teaspoon ground ginger
- One tablespoon chia seeds
- 1 1/2 tablespoons maple syrup
- 1/2 teaspoon pure vanilla extract
- A pinch of salt
You can use the following toppings:
Whipped cream
Walnuts
Chunks of apples
Coconut sugar
Procedure:
Cell 1 / 1 | In a pot, mix the oats, chia seeds, apple, cinnamon, salt, milk, ginger, apple sauce, and maple syrup. |
Cell 2 / 1 | Cook it over medium heat for 9 to 15 minutes while stirring it often. It is ready when the oats soften, and it thickens |
Cell 3 / 1 | Put the vanilla extract. Stir |
Cell 4 / 1 | Pour it into the dish and serve with your preferred toppings |
Making Apple Pie From Scratch
In this easy-to-make apple pie, no chilling required, no pastry cutter or food processor. This recipe from Little Sweet Baker is so easy, cheap and amazingly delicious!
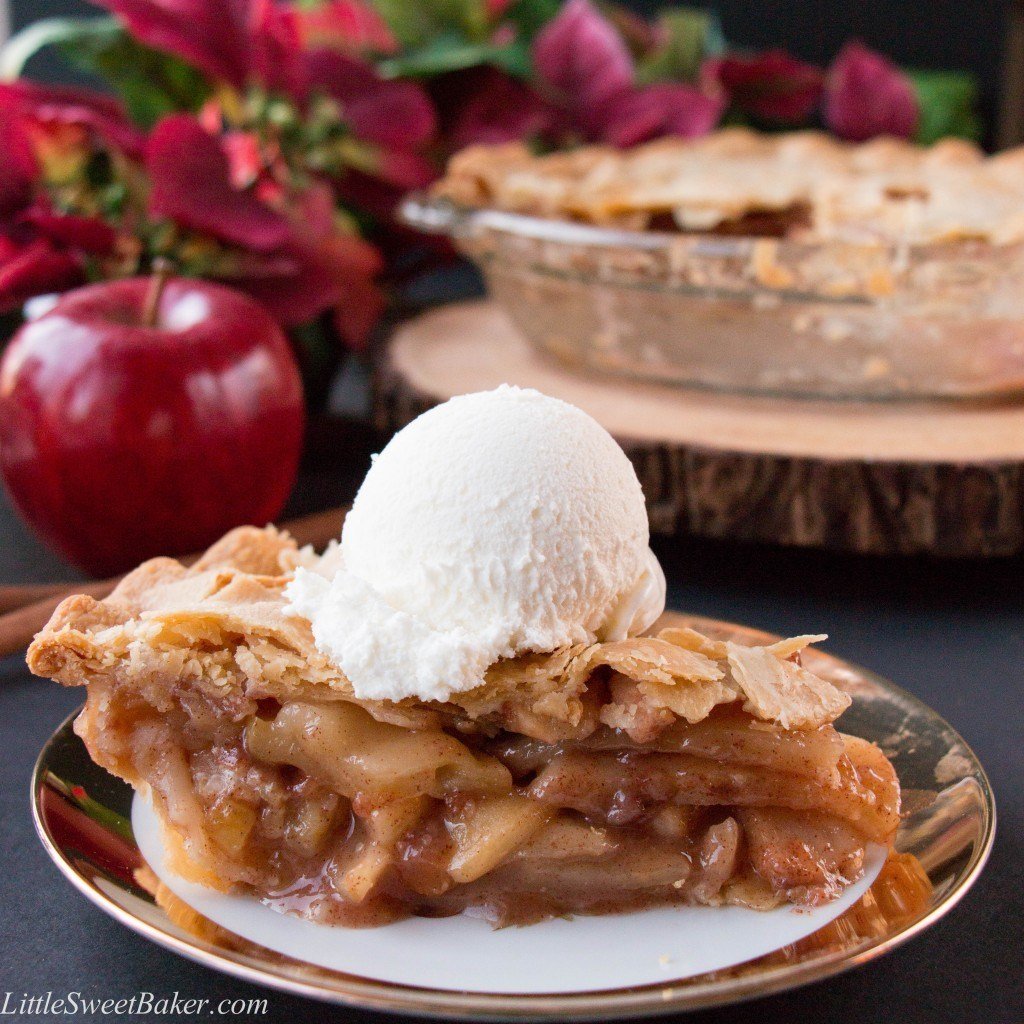
EASY HOMEMADE APPLE PIE Via littlesweetbaker
Best Toppings To Apple Pie
Food.com has shared three perfect toppings for your apple pies. These are the following:
- French Topping
- Dutch Topping
- Streusel Topping
For more toppings, CLICK HERE
Other Tips To Perfect Apple Pie
- Do not be afraid if your dough is a bit shaggy. It is better to have a loose dough than having a very dense crust by putting too much cold water
- For apples, Granny Smith is so far the best. Always make sure you peel them as their skins are too tough for pies.
- Do not rely on your oven’s heat alone. For you to have that golden-brown crust, brush your crust with egg or milk.
- Let your apple fillings (already mixed with the sugars and spices) sit overnight as the sugar will draw out the apple’s liquid, resulting from a moist, but not soggy filling. Do not throw the juice. Heat it in a pan and let it thicken. Add it to your apple pie.
- Again, keep your dough cold by chilling your butter and adding only cold water. This will make your crust flaky and tender
- Use a spatula to incorporate water.
- Par-cook your apple
- Always rest your apple pie for about 5 to 10 minutes before serving.
Our 15 Best Tips for Making Perfect Pies Via thekitchn
For more excellent tips, read Sweets Serious Eats’ Food Lab Top Tips for Perfect Apple Pie
Common Mistakes When Cooking With Apple Pie
Via giphy
- You don’t use cold water and worse, you pour it all at once. Ice water is needed to chill the fat for a good pie crust. It is also advised to add a tablespoon of ice water one a time to keep your dough in good condition.
- The butter is not cold enough. Always chill your butter before mixing
- You overwork the dough. It should resemble coarse meal before you add the ice water
- Not letting your pie sit for 15 minutes.
- You don't use egg wash. Brush your crust with a beaten egg or milk. This makes it brown and glossy
- You don't chill the pie dough. Always keep it cool to have a flaky and tender crust pie.
Experts' Advice
“Some good apples for apple pies include Golden Russets, Bramley’s Seedlings, Newton Pippins,”
“To have that nice crisp crust, prefer a metal pan.”
“My favorite crust has butter and cream cheese in it. It gives that very delicious and flaky crust I like"
“It takes at least three varieties of pie for you to strike a right balance between fragrance, softness, and firmness.”
“If the recipe does call for it, add some acid like one tablespoon of lemon juice or vinegar. It interferes with the elasticity of the gluten which makes the crust tenderer”
Best Recipes with Apple Pie
Salted Caramel Apple Pie by Brown Eyed Baker
SALTED CARAMEL APPLE PIE Via browneyedbaker
The combination of the sweet taste of apples and the salted caramel is superb. It also gives you a melt-in-the-mouth butter crust. Sweet, salty and buttery – you just can’t resist it!
Apple Pie Bars by Food 52
Apple Pie Bars Via food52
This easy-to-do recipe will give your mouth a fresh take on classic American dessert with a very buttery graham crust – with an apple toffee filling topped with crunchy streusel.
Spiced Bourbon Apple Pie by A Beautiful Mess
SPICED BOURBON APPLE PIE Via abeautifulmess
This will give you the same sweetness and buttery flavor of your favorite apple pie, your favorite caramel, warm oak, and vanilla extract, and at the same time a punch of booze.
Caramel Apple Cheesecake Pie at Annie’s Eats
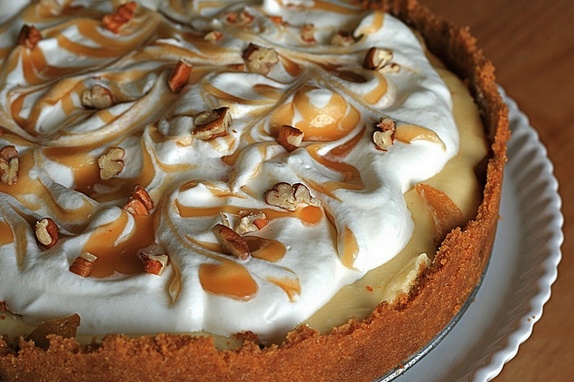
Caramel apple cheescake pie Via annies-eats
Sweet and creamy – this combination is made with cream, salted caramel, and your favorite oats! It is also made with caramelized apples, and topped with a layer of cheesecake.
Apple Pie Breakfast Cakes by Jessica Merchant at How Sweet It Is
Apple pie breakfast cakes Via howsweeteats
Turn your apple pie dessert into a good and delicious breakfast cakes. Added with yogurt, cardamom, and of course your favorite fresh apples and cinnamon – you can have a healthy and a sweet breakfast in the morning.
Fried Apple Pies from Food 52
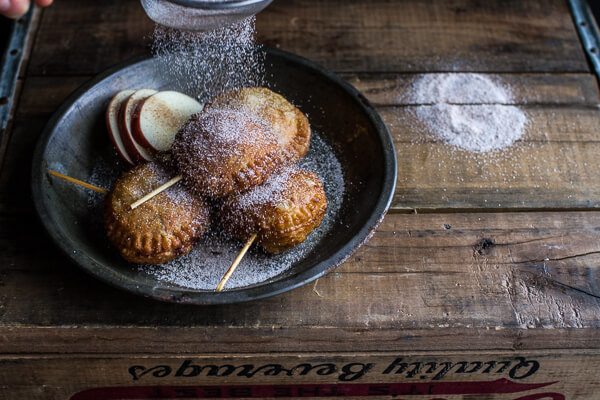
Deep-Fried Apple Pies from Scratch Via food52
Think of a caramelized apple in a fried puff pastry, and is sprinkled with the sweet cinnamon sugar.
For more great recipes, read Huffing Post’s Apple Pie Recipes
Nutrition Facts of Apple Pie

A one piece of apple pie can provide you a good amount of protein, calories, fibers, sodium, carbohydrates, and fats. It is also dependent on the amount and type of ingredients that you use. It also gives some minerals and vitamins due to the apples, butter, and other ingredients.
According to some research, some of the benefits of eating apple pie include:
- Lowering cholesterol
- Treating diabetes
- Reducing inflammation
- Assisting digestion
- Enhancing memory
- Preventing other chronic ailments
FAQ
How do I stop apples from turning brown after they're peeled and sliced?
One of the easiest ways is to submerge your cut apples in plain water to reduce the amount of oxygen that can get into it. Some also squeeze some lemon juice in the water.
Why is my apple pie runny?
You didn’t use enough thickener, or you put too much juice and liquid into your filling. This is also due to the sugars that pull out juice from the apples. It is a good idea to let your apples sit and drain for 30-40 minutes after boiling. After mixing your sugar and spices, let it rest again for about an hour and drain.
How long does an apple pie need to cool before cutting?
It is ideal to let your apple pie sit for 10-15 minutes, or at room temperature before serving
What is the best temperature for baking apple pie?
The common baking temperature is at 375 degrees Fahrenheit for 20 minutes then reducing the heat to 350 degrees F for about 45-60 minutes. Some also preheat their ovens at 425 degrees Fahrenheit, reducing the temperature into 325 to 350 degrees until golden-brown (most fruit pies are baked at this temperature).
Baking time also depends on the type of apple you are using. Sweeter apples like Delicious and Macintosh cook faster while others like Braeburn and Granny Smiths cook longer.
How many pounds of apples are needed for an apple pie?
A pound of apple can make three cups, and the most recipe calls for 8 cups of sliced apples, which is equivalent to 2 2/3 pounds of weighing.
Can you leave the apple pie you made today on the countertop and consume it tomorrow?
It is okay as long as you keep it tightly covered, and there is no custard in it. Otherwise, we recommend you keep it in the fridge and re-warm it. The problem with letting it on the countertop is that the bottom might get too soggy from the juice.
Further Reading
- Common Mistakes to Avoid When Making Pie from The Kitchen.com
- Apple pie facts, benefits and precautions from Health Benefits.com
- Pie-making Equipment from Pie Chefs.com
- Apple Pie Nutrition from FitDay.com
- Common Mistakes when Baking Apple Pie at BonAppetit.com
- How to Make the Best Apple Pie Tips from Epicurious.com
- Pie-troubleshooting Guide from Food 52.com
- Ultimate Guide for Pies from Baked Greens.com
- Apple Pie from Wikipedia.com
Leave a Reply